Introduction

Getting Started

In this post, we’ll guide you through your first steps in using and setting up Live Spirits. We understand that starting something new can be exciting yet overwhelming, so we’re here to make the process as seamless as possible for you.

CommandDescriptionAvailable Events
$usernameDisplays Twitch usernameSubGifted subResubFollowGreetDonationCheer
$tierDisplays subscription tierSubGifted subResub
$cumulativeAmountShows how many months have been given away to this userGifted sub
$messageDisplays message by user. This can be empty or anonymous.SubGifted subResubDonationCheer
$bitsShows amount of Bits donatedCheer
$durationShows how many month a user is subscribedSubGifted subResub
$sourceDisplays the payment server used. F.e: PayPalDonation

Set up your Live Spirit

Step 1: Connect Your Twitch Account

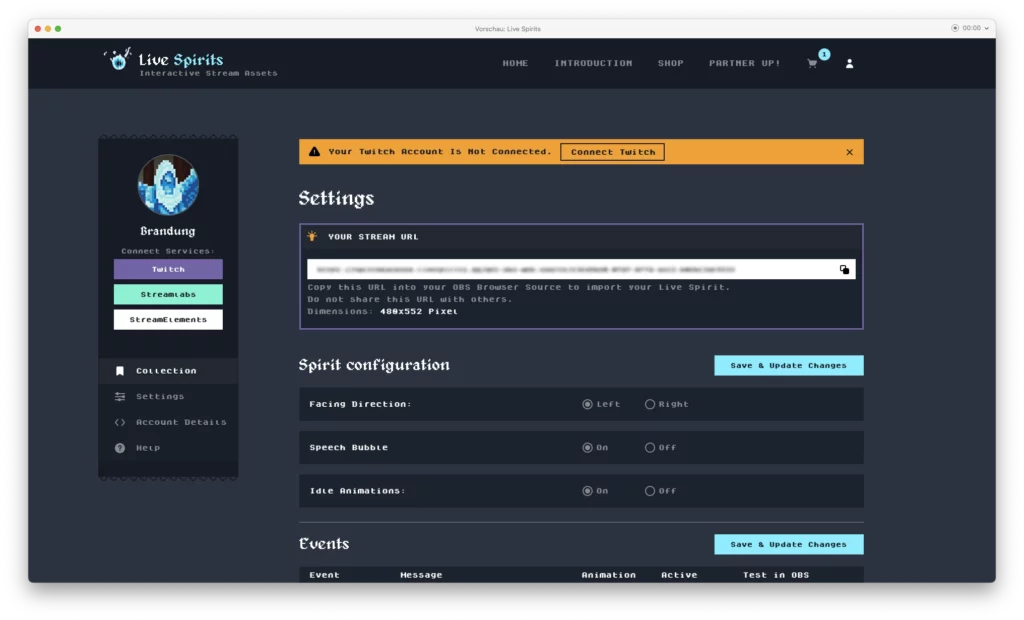
  • Log in to your Live Spirits account dashboard.
  • Navigate to the settings section and find the option to connect your Twitch account.
  • Follow the prompts to link your Twitch channel to Live Spirits.

Step 2: Connect Your Donation Service

  • In the sidebar section, locate the “Donation Service” option below the Twitch button.
  • Choose your preferred donation service from the available options. (StreamLabs or StreamElements)
  • Follow the provided instructions to integrate Live Spirits with your chosen donation service.

Step 3: Copy Your Personal Stream URL

  • Locate your personal Stream URL within the Live Spirits dashboard.
  • Ensure that you do not share this URL with others, as it is unique to your Live Spirits setup.

Step 4: Create a Browser Source in OBS

  • Open your OBS application.
  • Create a new scene or select an existing one where you want to use Live Spirits.
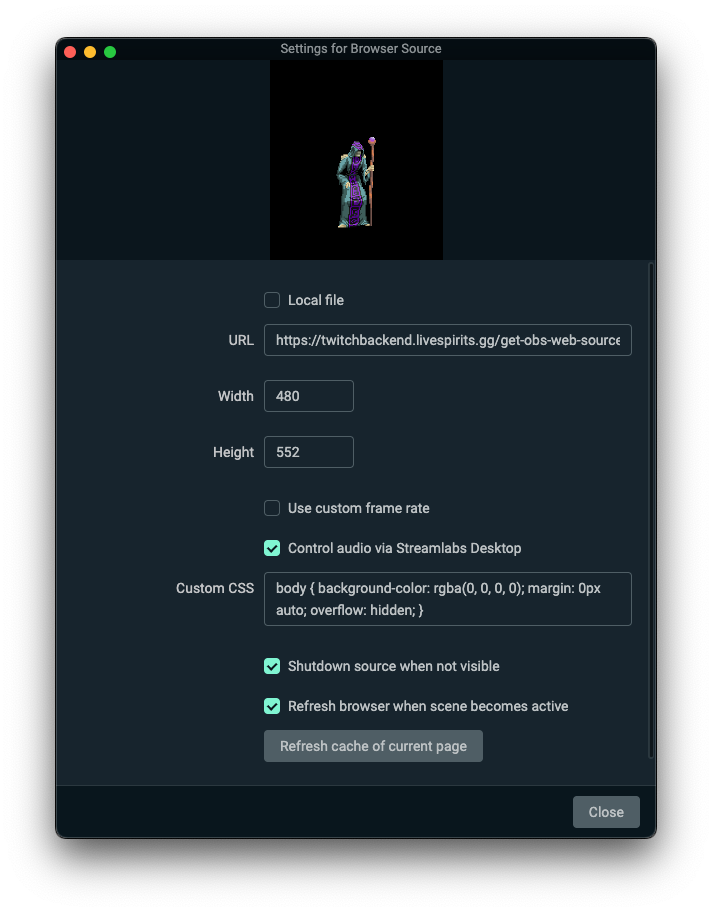
  • Add a new “Browser Source” to your scene.
  • Configure the Browser Source settings as follows:
    • Dimensions: 480×552 Pixels
    • Enable the option to refresh your browser when the scene becomes active.
    • Enable Browser Source Hardware Acceleration (Preferences -> Advanced (scroll way down)

Step 5: Event Settings

  • In the Live Spirits dashboard, navigate to the “Event Settings” section.
  • Adjust the speech bubble text and customize it to your liking.
  • Utilize variables like usernames and donation amounts to personalize the interactions.

Step 6: Save Your Configurations

  • Save all your configurations within the Live Spirits dashboard.
  • You are now ready to incorporate Live Spirits into your streams and enchant your audience with captivating animations.

Enjoy using Live Spirits to enhance your streaming experience!